The art of recycling for a greener environment starts with seeing trash as "abandoned material" so that we can create "Abundance from the Abandoned" in "Amazing Ways".
You can find free products or materials for making crafts everywhere. If you look out for them, you can find them:
-in your home.
-at work. -from your friends and neighbours. -at restaurants, stalls or shops you often patronise. -in public areas.
You just have to try to get your hands on them before they are discarded. I see many material you can work with in this bin. Can you spot them too?
If you are good at painting, instead of buying drawing pads, you can consider painting on empty glass bottles. This is a gift I received from a friend in Beijing. It is a painting of my husband and son on a snuff bottle. The artist who created it managed to copy the likeness from a photo I gave my friend.
I think that is a neat idea. So, if you have recently celebrated with a bottle of champagne, instead of throwing the empty bottle away, you can either do it yourself or find an artist to have your photo painted on it to commemorate the event you opened it in celebration.
What are you good at making? You can list out the tools and material you need to complete your work on a piece of paper and note beside it what other material you can consider using as substitutes. Some crafting tools can be expensive. So, use your creativity to improvise with the available tools or material that you have on hand to complete your craft.
For example, when I was learning to make wirework jewellery, I discovered that I could use as working material:
-the copper wires removed from leftover electrical cables.
I managed to use them to learn to make Roman bracelets from a book I borrowed from the library.
-the trolling stainless steel wires that my husband no longer use.
These are the tools I made use of to create jump rings…
…to create this beaded necklace.
I love using material that would otherwise be discarded in my craftwork. I call my efforts, creating abundance from the abandoned. Since I enjoy handcrafting, I am always on a look out for free crafting tutorials online. But instead of buying new material to create, I tend to use discarded material. For example, at my bike shop I have lots of punctured tubes to work with. Instead of using ribbons, here are some of the things I can create with punctured tubes.
Punctured tubes can be used to cover a hole in a chair.
Instead of buying leather, I experimented with tubes to learn leather craft.
I have also experimented with used tyres from my bike shop. My customers used to enjoy sitting on this chair I created with them while they were waiting for their bicycles to be fixed. However, the raffia strings I used to tie them together disintegrated over time. So, if you are inspired to create the same, you have to use stronger material as fastenings.
Do you like crafting with fabric? My uncle used to work for a textile wholesaler. He gave my mom lots of fabric samplers and unsold leftover fabric at the end of each roll. My mom was able to sew quilted blankets, cushion covers and floor mats with the scraps of fabric received. If you require fabric in your craftwork, see if you have friends who enjoy sewing or who are in the tailoring business. They should be willing to give you their scraps. I used to receive used zips and scraps of fabric from a friend who is a tailor. That was because I told her once that jewellery can be created even with damaged zippers.
You can also upcycle clothes you or your family members have outgrown. To upcycle means, to reuse discarded material in such a way that it creates a product of higher quality or value than the original. What you are able to create yourself will be valued. With some creativity, anything can be upcycled. If you do not want to upcycle your clothes but you are not comfortable about wearing them again because you have worn them one time too often or they have gone out of fashion, you can learn to embellish them by adding decorative details so that they look different. That will require you to take up some basic sewing skills though.
Currently, I save all crafting tutorials with potential to create with free material on my Pinterest board, “Abundance from Abandoned”. From there you can explore the free material you can use in your craft.
This video gives you an idea what you can craft with fruit foam wraps.
Once you have discovered the kind of free material you would like to work with, tell everyone you know to keep them for you. And be friendly with storekeepers of shops you often buy your stuff from as they may have lots of packaging material which you can make use of in your craft.
These are the other practical stuff that I have made over the years with free material:
I managed to create this weaving tool with my empty herb supplement bottle. Instead of yarn, I cut strips out of plastic bags to weave.
These watering pals for watering plants are made of PVC bottles and dressed up with plastic bags.
For my former kitchen.
This is how I decorate empty containers for storing my stuff.
Costumes and hair pieces I made for school concerts to reduce the cost of paying for clothes that my children may only wear once during their performance.
Bouquet cum duster that I designed and made with plastic bags which can be given out as gift.
With these creations, I was able to conduct a workshop on recycling and upcycling for some university students in UTAR during one of their extramural activities.
Musical instrument I created for my children to play with.
I designed and created this dog poo scoop with a PVC bottle and some plastic bags. I hope owners taking their dogs out for walks at the public park in the neighbourhood will learn to make them so that it will be easier for them to clean up after their pets.
This new year greeting in Malay for display at my bike shop is made of cardboard and strips of plastic bags.
Placard I made for my bike shop to inform my customers when it will closed for the festive holidays.
Before I started my bike shop, I often collect my free cardboard boxes from my regular fruit stall. These are some of the stuff I am able to create with my collection:
Mini cupboard
It was made wide enough for me to use empty tissue boxes as drawers.
I have been collecting empty sachets for coffee because there is a thin film of aluminium foil inside. I discovered that they can be cut and folded to create a bag like this.
You do not have use the sachets inside out if they have lovely designs on it.
I prefer to crochet over making bags out of this material and will gladly give them away to anyone interested to collect. When I crochet I also consider using cut strips from plastic bags or raffia strings as yarn in my work.
Items that would otherwise be discarded can become valuable to others if it has sentimental value. That said, have you ever thought of using fallen hair to create craft? You can learn the process of creating hairwork by watching this video.
Have you heard about kombucha? It is a fermented tea. I read that it originated in China and other parts of Asia over 2000 years ago.
To brew it, you will need:
-water -tea -sugar -SCOBY (Symbiotic Colony Of Bacteria and Yeast) pellicle with kombucha (the starter tea)
A new batch can be brewed with just the kombucha as starter tea as the SCOBY culture is present in it but it will take a longer time to ferment without the pellicle. The SCOBY pellicle is usually supplied with kombucha. However, if you only have the pellicle, you can use two tablespoon of distilled white vinegar to replace the kombucha as the starter tea. New SCOBY pellicles will form as a by-product of the fermentation process.
I became interested in learning about kombucha when I found out that the SCOBY pellicles used in the production of kombucha can be dried to become a leather like fabric that you can use as art and craft material. Watch this video to see how the material can be created with kombucha.
As shown in the above video, you can make SCOBY pellicles in petri dishes:
-by pouring two tablespoon of kombucha (must be unflavoured starter tea) into each dish.
If your intention is to make art and craft material with the SCOBY pellicles produced, you can:
-add colourings of your choice to each dish.
-leave them to ferment for 2-3 weeks till pellicles are formed.
-check thickness of pellicles.
-when thick enough, take them out of the dishes to dry under the sun for a day. -bring them in to air dry in a well ventilated area.
You can start crafting with them when they are dry. As to what you can make with them, check out videos shared at GiY: Bio Buddies. I like how they were able to make lanterns with them.
Other than that, why should anyone take the trouble to brew kombucha? Based on my research, it is a beverage filled with:
-amino acids
-vitamins B -vitamins C
-minerals
-antioxidants
-probiotics
Drinking it regularly will:
-boost immunity.
-enhance mood.
-fight allergies.
-detoxify and defend body of infection and disease.
-detoxify liver which will put you in a happy mood.
The tea you buy to brew kombucha should be organic as you do want them coated in pesticides which can inhibit the fermentation and brewing process and can eventually kill your SCOBY. These are the type of tea you can use:
-pure black tea (reported to make it much more flavourful). -green tea -white tea -oolong tea -hibiscus tea -a blend of the above
You should avoid using teas:
-that are scented or flavored teas which can effect the growth of your kombucha culture.
-like Earl Grey that will introduce naturals oils as they float on top and suffocates the SCOBY.
-like Chai which contains cinnamon, cloves and cardamom, all of which have antibacterial properties, that will kill the SCOBY. -that are herbal like peppermint or chamomile as they will not be able to provide the nutrients necessary to feed your kombucha culture.
Do not start the process till you have the following utensils on hand:
-stock pot or sauce pan -long *wooden spoon
-glass jar with a wide opening to ease adding or removing SCOBY pellicles in size of:
1/2 gallon or 2 quarts (64 oz / 1.9 Liter) glass jar - 2 units
-Tightly woven cloth to cover the jar like:
clean napkins or tea towels or
coffee filters or
paper towels
-Airtight Bottles: Six 16-oz glass bottles with plastic lids or swing-top bottles or clean soda bottles
-Small funnel to ease pouring into bottles
*Note: prolonged contact between the kombucha and metal both during and after brewing can affect the flavor of your kombucha and weaken the SCOBY pellicles over time.
To start, wear a pair of gloves and spray Isopropyl Alcohol (IA) on the utensils you will be using:
-spoon -sauce pan -jars -funnel -cookie tray work surface (if you are also making kombucha leather)
Here are the steps based on all the articles I have read about brewing kombucha.
If you still have doubts about your ability to start, you can watch this video I found on You Brew Kombucha Youtube Channel as the brewer shares a lot of answers to questions that you are most likely to ask as you start brewing your own kombucha.
You can also learn from Raw Brewing on how to start a Kombucha Brew Log so you can record the processes correctly. It will help you nail the acidic flavour that you prefer best for your kombucha.
Once you have started brewing your own kombuca and have a collection of pellicles in your SCOBY hotel, check out this article:
I discovered a new way to keep a round bag I crochet in shape. I made use of the inner packaging from this cookies container.
This is how it looks like.
After washing it, I cut a slit at its vertical edge to make it fit perfectly into the bag.
So, be on a look out for these PVC inserts in all shapes and sizes. There may be one that can be used to keep your bags in shape. Throw in some silica gel packets to reduce the chances of moisture getting into your bags. You do not want your bags to smell musty from growth of mold.
You do not have to buy silica gel as they are usually supplied with food product or health supplements that you have purchased. You should avoid using silica gel packets that are stained.
If you cannot find PVC inserts in the right size, you can use cushions that have gone flat on you. You can fold it up and tuck it into your bag or cut it up to size to sew.
It does not matter if the cushion protrudes out of the bag. Hopefully, the dustbag that you have received on purchase of your bag is large enough to hold and protect it. You can also re-use your neck or baby pillows that you may have kept in storage somewhere for the same purpose. If the baby pillow is too small, wrap a towel around it to fit the bag. You can also slip towels in laundry bags
Let's attached them together. A nice way to keep my mask separate from the rest of the items I want to bring along.
No, the strap for the handle is not too short. I can lengthen it.
When you can create a bag that can be used in multiple ways, you will enjoy using it for a longer period of time. What other add ons can be attached to a bag to make it look different?
What about a flap that you can hide inside the bag when you want to use the one with buckle already made?
And yes, I can slip the smaller bag inside the bigger one to compartmentalise it.
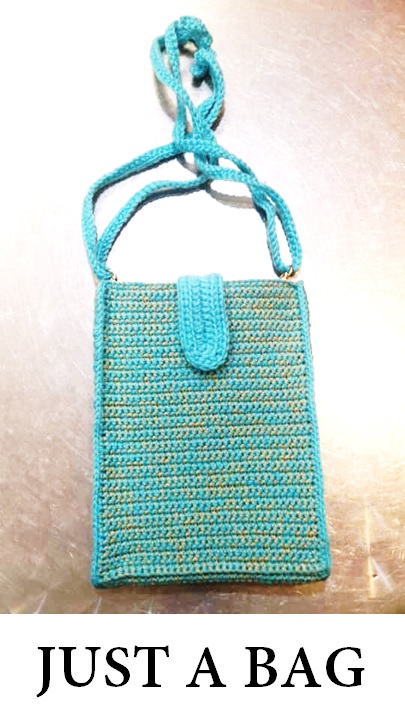
My handbag was snatched once before and eversince then, the kind of bag I usually carry is a fanny pack. I finally designed and created one that I can use it as a crossbody bag too. This is how it looks like.
I can convert it into a regular bag. It is large enough to store the worn out Elle fanny pack I have been using for years.
What about the straps?
I can hide them in a pouch that I have created to tuck them in when I use it as a regular handbag.
This is another way I can use it. The flap can be used to hide this pouch.
If I use the bag inside out, the pouch is large enough to store my handphone. I can leave the flap inside the bag.
This is how it will look like if I take out the flap.
I like the idea that I can change the handle of the bag to match the shoes or clothes I will be wearing for the day or an event I will be attending. With a broader strap attached it works as a unisex bag.
Instead of creating compartments in the bag which will require more yarn, I can insert a cosmetic pouch I have or fanny packs that I no longer use.
The Zero Waste International Alliance (ZWIA) is encouraging the United Nations to adopt the following internationally peer-reviewed definition of Zero Waste and to work with ZWIA and other Zero Waste organizations around the globe, to create a just world of vibrant, resilient, Zero Waste communities, in harmony with nature:
"Zero Waste: The conservation of all resources by means of responsible production, consumption, reuse, and recovery of products, packaging, and materials without burning and with no discharges to land, water, or air that threaten the environment or human health."
So, how can I adopt the principles of zero waste in my life?
I believe that handmade product can help save the environment. You are less likely to discard something that you have made or received as a gift. This is a crochet top that I made for myself more than 20 years ago. My daughter could wear it now.
Now that I have revived my interest to crochet, what kind of product will I be able to create that will help the environment?
I will start with a reusable bag. I will design a bag that will allow the user to:
change its size
change its colour
change its handle
I hope that my design will:
reduce the "discard mentality" as you cannot be bored with a bag that you can play with in shape, colour and size.
enable you to extend its life as damaged portion of the bag can be replaced.
use less material to produce by using net (see through) crochet patterns so that the resusables bags we keep getting free from retailers can be used as inserts.
allow the creator to make use of leftover material to work with and reuse what they have.
promote a reuse culture by encouraging crafters to consider using discards in their work creatively.
extend the life of low quality reusable bags.
allow users to personalise their bags as they can decide how they can decorate them.
inspire others to make stuff that they need if they are able to.
Is that possible? Yes it is. I hope that my project will make the younger generation realise that handmade items can be cool to create and own. Let's start a reuse mindset revolution.
Since I run a bikeshop I will start with this discard which is one of the packaging items for bicycles.
If I cut the protuding parts off, I can use it as a base for my crochet container.
It fits in nicely in this container I crochet.
It keeps its base flat.
If I want to, I can use another circular piece to crochet a cover for it.
When I use it as a container in my reusable bag, it will protect the glassware for storing food that I bring to my shop to eat for lunch.
But it is not just a container once I added the second layer I crochet. I can add this layer to the container with a piece of string so that it can be removed.
This is how my creation looks like once the plastic circular base is removed.
If this is how I would like to use it, I can use cords removed from paper bags and use them as handles. The net edge on the second layer allows me to push the cords through and secure them to it. Once done, it has become a container cum bag.
Remember that you are only a hoarder if you do not make use of what you keep.
Based on how I would like to use it, which depends on how creative or fashionable (daring) I am, I can:
add another layer to increase the height of the bag.
remove the orignal layer to add a layer in a different colour or crochet pattern.
add additional layers in many different colour.
add another layer in different crochet patterns.
crochet a layer of see through or net pattern so that I can use a reusable bag as insert.
change the handles on the bag.
You can adopt the above idea by making two square containers. If you join them together and add the layers, it can become a rectangular bag. I like the idea of using granny squares in this project because I can use leftover material in different colours to crochet them. For example, I managed to crochet the granny squares on this crossbody crochet bag with cut strips of plastic bags in different colours. You should not have any problem using raffia strings too.